Cook With the Sun: Solar Oven Recipes
Sweltering summer temperatures can be a serious drag, but here at Earth911, we try to look at the glass half-full. An unseasonably warm summer may lead us to crank our air conditioners more than usual, but it can also hold the secret to energy-free cooking. We’ve put together five solar oven recipes to help you kick start your solar oven cooking.
You may be familiar with solar ovens from whipping up s’mores other camping treats, but you can actually use these sun-powered wonders to cook just about anything — without using a single kilowatt-hour of electricity. Check out these five tasty recipes for a solar oven, and take advantage of summer heat by cooking with the power of the sun.
Solar ovens consist of a system of reflectors and a cooking pot. The rest is up to your imagination! Once you have assembled or purchased your solar oven, you can use it to prepare hot meals in the backyard, at a campground or wherever your heart desires — even a sunny beach. Photo: Flickr/EBKauai
Choosing & Using Your Solar Oven
Basically, a solar oven consists of a system of reflectors and a cooking pot. The setup coverts the sun’s rays into heat energy to bake, boil, or steam your next meal. In a solar oven, you can cook anything that you can cook in a conventional electric or gas oven and many meals that you can cook on the stove.
As an added bonus, heading outside to use a solar oven makes cooking your meals a fun-filled event for the whole family. The young (and young-at-heart) will love watching lunch slowly cook under the sun’s rays, and your meals will be even tastier after you’ve had to work a little for them. Solar ovens are also easily portable, meaning you can cook a hot meal at the beach, park, campground, or wherever your heart desires.
If you’re the DIY type, you can easily make your own solar oven out of items like cardboard, a thermometer, foil, glass, and black spray paint. Use these step-by-step instructions from Instructables, or check out this how-to video from aysproject to build your oven.
You can also opt for a store-bought solar oven. As you may expect, purchased models will cost a bit more than DIY alternatives, but they tend to heat up faster and reach higher temperatures. If you’d rather purchase a ready-made oven, check out the GoSun Sport or the Sunflair Mini Portable Solar Oven.
No matter which model you choose, the cooking method for your solar oven remains about the same. Start by placing your oven in direct sunlight, and allow the internal temperature to reach at least 200 degrees Fahrenheit before placing your meal inside.
Think cooking with the sun takes all day? Think again. If you refocus the oven to follow the sun’s rays every 30 minutes, your cooking time will be similar to cooking with a conventional oven or stove. You can also use a solar oven for recipes you’d use in a slow cooker (like a Crock-Pot). If your cooking pot does not have a lid, you may want to create some sort of makeshift cover to keep heat from escaping the pot, which can greatly increase cooking time.
Keep in mind that browning is unlikely in a solar oven due to lower temperatures and lack of air circulation. On the bright side, this means that you don’t have to worry about your food getting dried out or burned. On the not-so-bright side, you probably won’t achieve the crispiness or caramelization you could expect from a conventional oven. So, choose your recipes accordingly to avoid surprises.
As for the best solar cooking vessel, a dark, thin-walled pot with a lid works best, according to Solar Cookers International. Dark pots change the sun’s rays into heat energy, while shiny aluminum pots cause light to be reflected outward, reducing the oven’s temperature. Glass casserole dishes with lids will also do the trick.
5 Solar Oven Recipes
Photo flickr/Megan
1. Mediterranean Flatbread Recipe
What you’ll need:
1 cup olive oil
1/4 cup balsamic vinegar
1 teaspoon dried oregano
1 teaspoon dried thyme
Six pieces of flatbread
3/4 cup Kalamata olives, chopped
1 1/2 cups cherry tomatoes, halved
3/4 cup shredded mozzarella cheese
2 cups arugula, roughly chopped
For hummus:
1 can chickpeas, ½ cup liquid set aside
1/4 cup tahini
1 teaspoon kosher salt
1/2 teaspoon ground white pepper
1/2 teaspoon ground black pepper
1 clove garlic, peeled and minced
4 tablespoons extra virgin olive oil
How to make it:
1. In a small mixing bowl, whisk together olive oil, balsamic vinegar, oregano, and thyme. Salt and pepper to taste. Set your vinaigrette in the refrigerator for at least 30 minutes before cooking.
2. Meanwhile, start preparing your hummus spread. Add chickpeas, reserved chickpea liquid, tahini, salt, pepper, and garlic to a food processor or blender. Pulse lightly while drizzling in olive oil until smooth, about two minutes.
3. Arrange your flatbread pieces in the bottom of a large metal casserole dish with a lid. Spread about 2 tablespoons of hummus on each flatbread piece. Top with Kalamata olives, cherry tomatoes, and mozzarella cheese.
4. Cover the casserole dish with a lid, and place it in a pre-heated solar oven for about 20 minutes, or until cheese is fully melted.
5. Top with a small handful of arugula and a drizzle of balsamic vinaigrette before serving.
Solar cooking tips:
This simple preparation is ideal for your sun-powered oven. As is usually the case with solar cooking, it’s best to eyeball it or use a thermometer rather than sticking to a designated cooking time. This recipe should take 20 to 30 minutes in your solar oven, but cooking time will vary based on outdoor temperatures and sun exposure.
For best results, allow your solar oven to heat up to at least 250 degrees Fahrenheit before putting your flatbread inside. Check on your meal regularly, and remove it once the cheese is fully melted.
Keep in mind that your flatbread pieces will be warm and tasty, but you’ll have a hard time making them crispy in a solar oven. If you crave a crispy texture, brush your flatbread pieces with olive oil, and sear them in a cast-iron skillet on your stove for about a minute on each side before putting them in your solar oven.
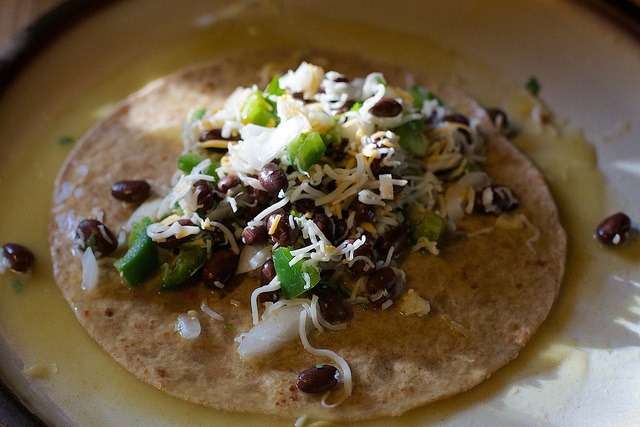
Photo Flickr/Alan Levine
2. Whole Bean Enchiladas Recipe
What you’ll need:
16-ounce can of whole black beans
16-ounce can of sweet corn (or two cups of fresh corn)
3/4 cup of red onion, diced
1 large tomato, chopped
1/4 cup cilantro, chopped
2 teaspoons olive oil
16-ounce can of enchilada prepared sauce
Six whole wheat or corn tortillas
1 1/2 cups shredded cheddar cheese
Salt and pepper to taste
How to make it:
1. In a large mixing bowl, combine black beans, corn, red onion, tomato, cilantro, and olive oil. Salt and pepper to taste. Allow your mixture to marinate in the refrigerator for at least an hour before cooking.
2. When you’re ready to cook, retrieve your filling from the refrigerator, and add half of the enchilada sauce. Stir to combine.
3. Scoop your filling into a tortilla, about six tablespoons at a time. Roll up the tortilla and place it into a medium-sized glass casserole dish with a lid. Repeat until you’ve filled all six tortillas.
4. Pour the remaining enchilada sauce on top, and cover with cheese. Cover the casserole dish with a lid and place it in your solar oven for about 30 minutes, or until the cheese is melted and the filling is warmed through.
Solar cooking tips:
The one-pot nature of this tasty vegetarian recipe makes it perfect for solar oven cooking. For best results, cover your enchiladas with a lid before putting them in the solar oven. Place your oven in direct sunlight, and refocus as needed to keep it out of the shadows.
Ideally, allow your solar oven to heat to 350 degrees Fahrenheit before putting your enchiladas inside. If using a DIY model, allow your unit to get as hot as possible (probably between 250 and 300 degrees Fahrenheit) before you start cooking.
To make sure your meal comes out right, keep an eye on your enchiladas and take note when the cheese begins melting. When you suspect they may be finished, use a fork to gauge done-ness. Your tortillas should be soft, the cheese should be fully melted, and the filling should be heated through.
Although it may be tempting, avoid lifting the lid on your casserole dish too often; allowing heat to escape your cooking vessel will increase baking time.
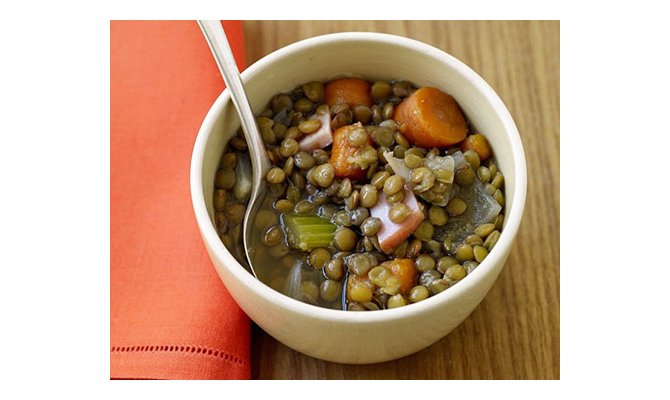
Photo by weightwatchers.com via thedailymeal.com
3. Slow-Cooker Lentil Soup Recipe via The Daily Meal
What you’ll need:
2 carrots, chopped
2 stalks of celery, chopped
1 onion, chopped
2 cloves garlic, minced
2 cups dry lentils
3 bay leaves
1/2 teaspoon dried thyme, crushed
1/2 teaspoon salt, or to taste
1/4 teaspoon black pepper, or to taste
8 cups canned chicken broth (substitute vegetable broth for a vegan treat)
4 ounces Canadian-style bacon (optional)
How to make it: View full instructions and tips at The Daily Meal.
Solar cooking tips:
Slow-cooker recipes work wonderfully in solar ovens. To set-it-and-forget-it, simply position your oven in a clear area of the yard, place covered soup inside and allow it to cook all day. Your soup should be ready for dinnertime in about six hours using this method (the same as a standard Crock-Pot).
For a slightly speedier meal, refocus your solar oven throughout the day to follow the sun’s rays, which should shave at least an hour off your cooking time.
Photo Flickr/Ben Millett
4. Rockin’ Ratatouille Recipe
What you’ll need:
1 cup eggplant, chopped
1 cup zucchini or summer squash, chopped
1 cup red or green bell pepper, chopped
1/2 cup tomato, chopped
1/4 cup sweet onion, chopped
2 cloves garlic, minced
2 teaspoons ground cumin
8-ounce can of no-salt-added tomato puree
Salt and pepper to taste
How to make it:
1. Combine eggplant, zucchini, peppers, tomatoes, onions, garlic, cumin, and tomato puree in a large metal or glass pot. Salt and pepper to taste.
2. Cover and cook in your solar oven for 4 to 5 hours, or until vegetables are tender. For faster cooking, refocus your solar oven to follow the sun around your yard, which should shave at least an hour off your cooking time. Serve alone or with cooked brown rice, mashed potatoes, or quinoa.
Solar cooking tips:
Packed with vitamin-rich veggies like eggplant and zucchini, ratatouille carries troves of obvious health benefits. But it’s also a perfect energy-free entree that couldn’t be simpler to whip up in your solar oven.
For a fresh-from-the-farmer’s-market flavor, cook your ratatouille over medium-low heat (between 200 and 250 degrees Fahrenheit). Any hotter could cause vegetables to lose their crunch, and tomato sauce may begin to brown around the edges.
To maintain consistent internal temperature, refocus your solar oven to follow the sun’s rays, and avoid lifting the lid of your pot too often. It’s fine to stir your ratatouille occasionally, but removing the lid too frequently can increase cooking time.
If you plan to leave your solar oven unattended while slow cooking, you may want to place it on a table or weigh down the lid to dissuade curious critters.
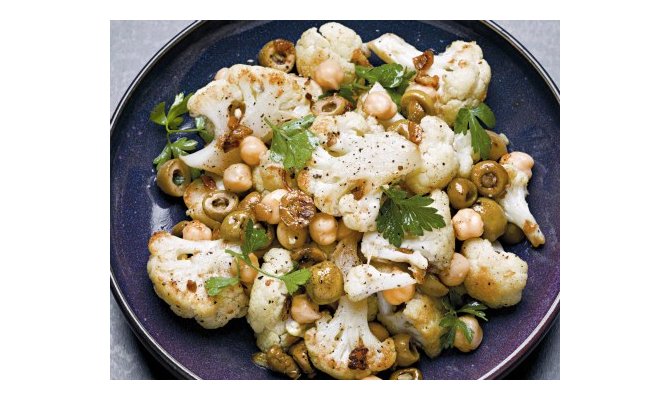
Photo courtesy of Cooking Light via thedailymeal
5. Roasted Cauliflower, Chickpeas, & Olives Recipe via The Daily Meal
What you’ll need:
5 1/2 cups of cauliflower florets
10 green Spanish olives, halved and pitted
8 cloves garlic, chopped coarsely
15-ounce can of chickpeas, drained and rinsed
3 tablespoons olive oil
1/2 teaspoon crushed red pepper
3 tablespoons flat leaf parsley
How to make it: View full instructions and tips at The Daily Meal.
Solar cooking tips:
Rather than racking up your energy usage to prepare this tasty roasted cauliflower recipe from The Daily Meal, pop it in a solar oven to shrink your footprint (and your monthly electric bill).
This recipe takes about 20 minutes when prepared in a conventional oven heated to 450 degrees Fahrenheit. So, expect it to take about an hour in your solar oven. Refocusing the oven every 30 minutes to follow the sun’s rays will help you cut cooking time for an even speedier snack.
Since you’d like a bit of a crunch to your cauliflower, opt for a dark-colored metal roasting pan with a lid. Dark colors draw in heat, and metal creates that sizzly effect that leaves your meal with a crisp-tender consistency.
What are your favorite recipes for cooking in your solar oven? Share them with the community in the Earthling Forum.
Feature image courtesy of Erik Burton
Editor’s note: Originally published on January 23, 2016, this article was updated in July 2019. Pictured foods are not actual prepared recipes but rather representations of main ingredients.
You Might Also Like…
10 Delicious Vegan Slow Cooker Dishes
Vegan slow cooker meals have a positive one-two punch on …Kimberly ButtonJanuary 10, 2019
Solar Ovens Serve Up Yummy Food Almost Anywhere
For an Earth-friendly epicurean treat, switch off your stove and …Patti RothJuly 17, 2018
11 Ways to Use Solar Energy Besides the Home
Solar panels can be installed on your home and save …Jenna CyprusJune 21, 2017
earth911
Follow this link:


